How to grow Anthurium andraeanum
Written by Maggie
Oct 29 2021
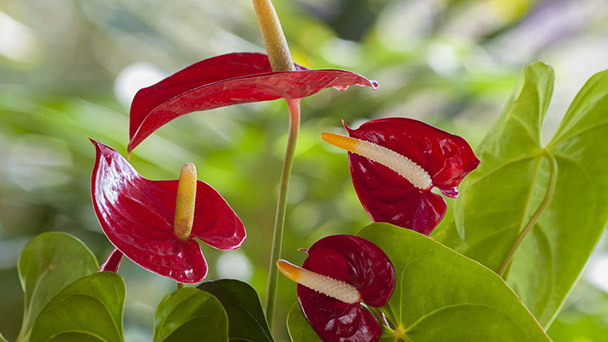
Anthurium andraeanum has buddha flame inflorescences and leaf-shaped bracts. The common bracts are red, pink, white, etc., and the leaves can be observed when the flowers fall. So how is Anthurium andraeanum cultivated? What are the good methods in breeding? What should be paid attention to when breeding Anthurium andraeanum? Please read it down with me with your questions!
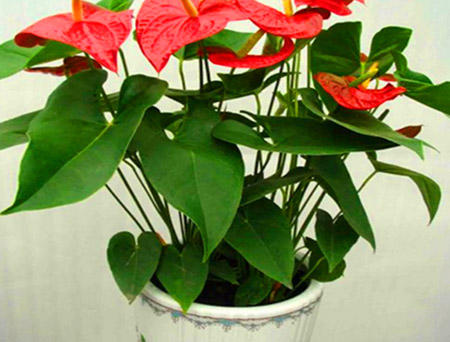
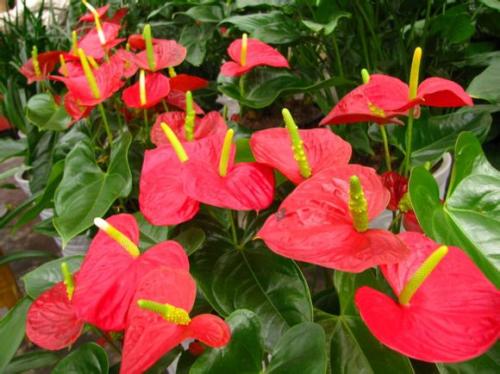
Anthurium andraeanum picture
Anthurium andraeanum breeding method (basic knowledge):
Best breeding time: Anthurium andraeanum generally use ramets to propagate, and erect stem varieties can also be propagated by cuttings.
The best growing soil: Anthurium andraeanum cultivation soil is the best loam rich in humus, loose and well-drained.
Growing humidity requirements: Anthurium andraeanum The ideal relative humidity for cultivation is 80{bf}~85{bf}, and the seedling transplant should be controlled at 85{bf}~90{bf}.
Optimum growth temperature: Anthurium andraeanum grows at 25-28℃.
Optimal growth light: Anthurium andraeanum is suitable for cultivation under appropriate shade light throughout the year.
Precautions for breeding Anthurium andraeanum:
Apply fertilizer:
1. Anthurium andraeanum will be fertilized once every half month during the vigorous growth period from May to September. The top dressing is mainly decomposed organic liquid fertilizer, combined with the application of phosphorus, potassium fertilizer or compound fertilizer. The branches can be used to support the plant when the flower stem is drawn out.
2. Anthurium andraeanum is the growth period from April to October. Topdressing is applied once a week, even after budding and before flowering. Watering should be controlled during dormancy. Flower-viewing varieties like a semi-shady environment and need sunlight in the morning and evening, otherwise it will be difficult to bloom. Leaf-viewing varieties should avoid direct sunlight.

Watering points:
1. Anthurium andraeanum should be watered dry and wet. After one watering, wait until the surface of the pot soil is dry before watering the next time.
2. Acid-loving water can be irrigated with acidic water with pH 4 to 4.5 or with rainwater, or ferrous sulfate with 0.1{bf}~0.5{bf} can be applied regularly.
3. In order to increase the air humidity, you can often spray water on the leaf surface and around the pot, but do not spray water on Anthurium andraeanum.
4. After autumn, as the weather turns cooler, watering should be gradually reduced. After entering the house and before leaving the house in early spring, watering should be controlled to keep the pot soil dry.
Pruning essentials: Cut off dead yellow leaves and diseased leaves in time during the growth period of Anthurium andraeanum; when the leaves are too dense, properly thin out some old leaves. Cutting off old leaves can also promote the growth of new leaves.
Pot soil replacement: Anthurium andraeanum should be potted during the summer dormancy.
Key points of reproduction: Anthurium andraeanum can be reproduced by cutting propagation, sowing propagation, tissue culture, etc.
1. Anthurium andraeanum ramification reproduction: a. The ramification period is mainly in the cool and humid spring, and the ramification can also be divided in the cool weather in autumn. Avoid branching in the hot summer or dry and cold season. b. Pay attention to the principle of not hurting the mother plant when dividing the plant. The side buds that are too large are not divided, the side buds that are too tight are not divided, and the side buds that are too weak are not divided. The main branches are easier to separate from the mother plant and are more robust. , At least 2 lateral buds above the main root system. c. When transplanting seedlings, the ramets can be evenly applied by hand to separate the side buds from the mother plant at the bud eye of the underground stem. When it is difficult to separate, use a sharp disinfectant blade to cut it at the bud eye. To remove buds from cut flowers, open the soil layer first, pay attention to the distribution of roots and the bud eye of the underground stem, carefully cut the bud eye, and then take out the side buds. d. After the cut side buds are slightly dry, they will be planted in a cool place to promote roots and restore growth. When planting, the roots should be flat, the plants should be upright, and support if necessary. Do not water immediately after planting. You can spray water on the leaves to maintain humidity. After 2 days, you can water or apply thin fertilizers according to the situation.

2. Sowing and propagation: Anthurium andraeanum is the main way to obtain new varieties of Anthurium andraeanum in breeding. Anthurium andraeanum fruits are berries, which must be picked and sown. Remove the peel and wash off the pulp before sowing to prevent the peel and pulp from rot and mold, which may affect the germination rate of the seeds. The sowing method can be pure sand to accelerate the germination method, sowing the seeds in clean river sand at a seeding depth of 0.5 to 0.8 cm, maintaining a certain humidity, generally about 15 days to germinate, and new leaves will grow quickly. When it grows to 5-6 leaves, it can be transplanted into a 1:2 mixture of pure perlite and peat soil or coconut bran for pseudo-plant cultivation.
Pest control: Potted Anthurium andraeanum main pests and diseases are bacterial wilt, leaf spot, root rot, Cylindrosporium, Cylindrosporium, nematode, red spider, aphids, lepidopteran pests, whitefly, Scale insects, snails, etc.
1. Anthracnose. Control method: For chemical control and strengthen cultivation management, it is necessary to ventilate and transmit light frequently, avoid watering or air conditioning condensate splashing on the leaves, and remove diseased leaves in time.
2. Starscream. Prevention and control methods: spraying can be used to prevent the damage at the initial stage. The control agents include: dicofol, fendigram, omethoate and bifenthrin.
3. Bacterial leaf spot. Prevention and control methods: In the early stage, the color of new leaves can be found to be dim, because the microtubule bundles are blocked by bacteria, which hinder the flow of water and the transportation of nutrients in the body, making the leaves dim and yellow. In a short time type infection will cause the pedicel and leaves to fall off the plant, and the growth point will rot quickly and the bacteria will flow out.
The experience of breeding Anthurium andraeanum:
1. Except in winter, it can be maintained near the south window. In other seasons, Anthurium andraeanum should be placed in a semi-shaded place indoors to avoid direct sunlight.
2. Anthurium andraeanum's suitable growth temperature is between 20~30℃. It starts to dormant after late autumn, but the room temperature should not be lower than 15℃. Avoid low temperature. Also avoid high temperature, poor growth under high temperature conditions.
3. Except in winter, water frequently to keep the pot soil moist. Anthurium andraeanum likes higher air humidity. You can place flower pots in shallow pots filled with pebbles and water, and often spray water on the plants and the surrounding ground. Avoid sprinkling water on the flowers after blooming.
4. The pot soil can be mixed with grass charcoal soil and pine needle soil, or pine needle soil can be used directly, and a small amount of decomposed horseshoe or long-term fertilizer can be added. It is best to use cold water (less calcium) or rain water. The hole in the bottom of the basin should be padded with tiles to ensure smooth drainage. From March to August, apply thin fertilizer every other week to two weeks.
5. To keep the soil acidic, the pH should be between 4 and 5.
Read Next:
Best 15 Indoor Plants for Low Light 2021
Latest Updated
- Benefits of Bugleweed - 7 Science-backed Health Benefits
- Bugleweed Dangers & Side Effects - Is It Poisonous?
- How to Plant Evergreen Trees - What You Should Know
- When to Plant Evergreens - Grow Guide for Evergreen Trees
- 12 Wonderful Evergreen Shrubs for Your Garden
- 12 Popular Evergreen Plants with Pictures for Beginners
- When And How To Prune A Lilac Bush Like a Pro
- How to Grow & Care for Lilac Vine (Hardenbergia Violacea)
- Japanese Lilac Tree (Syringa Reticulata) Care & Propagation Guide
- Shumard Oak Pros and Cons - What to Know
Popular Articles
- Winter maintenance of Antirrhinum Majus
- How to Grow Terminalia Mantaly Tree
- How to Grow and Care for Crossostephium Chinense
- How to grow Antirrhinum Majus in spring
- Peristeria Elata (Dove Orchid) Profile: Info & Care Guide
- Underwatered Snake Plant (Sansevieria Trifasciata) - Signs And How To Fix
- How to Care for Brazilian Jasmine Plant (Mandevilla Sanderi)
- How to Grow & Care for Graptopetalum Purple Delight in Summer
- Rosa Chinensis (China Rose): Plant Growing & Care Tips
- How to Care for Baby Sun Rose (Aptenia Cordifolia)