Juniper: Grow & Care for Juniperus communis
Written by Iris
Aug 06 2021
Juniper is a coniferous plant of the genus Juniper. Originally from the Northern Hemisphere, Juniper were primarily used for ornamental purposes. Varieties range from low-growing ground covers that are used extensively in landscaping, small compact varieties suitable for smaller gardens and rockers, to large, long-lived trees that can tolerate extreme cold conditions. The latter is used more for taxidermy cultivation in large gardens.
In early to mid-spring, take a six- to eight-inch cutting from a hardwood branch that is at least a fourth of an inch in diameter.
After collecting your cuttings, snip the bottom of each at a 45-degree angle and remove the leaves from the bottom half.
Dip the cut end in a rooting hormone compound like Bontone II, made by Bonide.
If you're looking to pick some up for your gardening kit, head to Arbico Organics.
Combine one part sand with three parts seed starting soil. Then, combine that with an equal amount of perlite or vermiculite and mix well. Fill a four-inch pot with this mixture.
Make a hole in the soil using a pencil or chopstick and insert the cutting so that at least two inches are buried.
Place in a spot with bright, indirect sunlight and keep the soil moist (but not wet).
After three months or so, roots should begin to form. Give the cutting a gentle tug to see if it resists. If it does, the roots are growing in the soil.
At that point, harden rooted cuttings off for four weeks. That means bringing the plant outdoors in a shaded, protected area for 30 minutes on the first day, then add about 30 minutes of outdoor exposure each day to follow until the plant can sit outside all day.
Bring cuttings in each night, and don’t put them outside on days when there are harsh winds or extreme temperatures. You want to acclimate them to the outdoors gradually. In three or four weeks, you can leave the cuttings outdoors full time.
When the winter rolls around, store the potted cuttings outdoors under protection like insulating foam or a thick layer of pine boughs. Remove the cover in the early spring.
Plants should be about a foot tall before you plant them in their permanent home, which should be in the late spring if everything goes according to plan.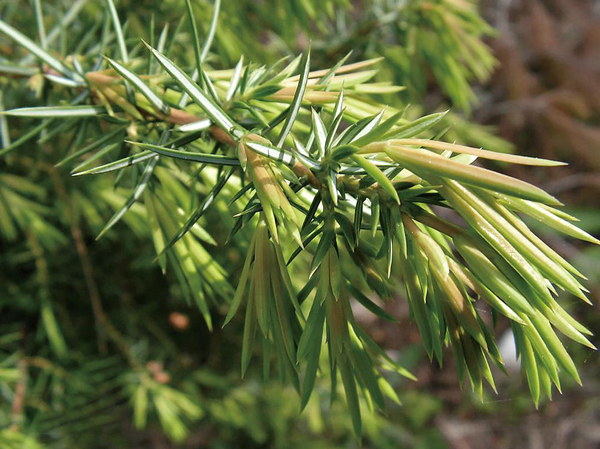
This is a common technique used by gardeners who are training junipers as bonsai, but it works well for propagating plants from mature outdoor shrubs as well.
In the spring, when air temperatures are above 45°F, locate a branch or stem that is at least a quarter inch in diameter, a foot long, and woody. Clip away any foliage from the middle four inches.
Using a clean, sharp knife, cut two parallel vertical rings around the branch about an inch apart. Then, use the knife to strip away the bark between the two cuts.
The goal is to just expose the lighter interior wood, which means you’ll need to cut through the bark and green cambium layer.
Then, wrap moistened sphagnum moss around the cut. The moss should extend about an inch above and below the cut.
Cover the sphagnum moss in clear plastic and secure it at the top and bottom with zip ties, twist ties, or string.
Keep an eye on the moss and occasionally check to make sure that it is still moist. If it dries out, pour in a little water or spray the moss with a spray bottle and reseal.
Within a few months, you should see lots of roots growing in the moss. At that point, you can cut the branch or stem just below the plastic bag. Remove the plastic and moss, and plant as you would a transplant.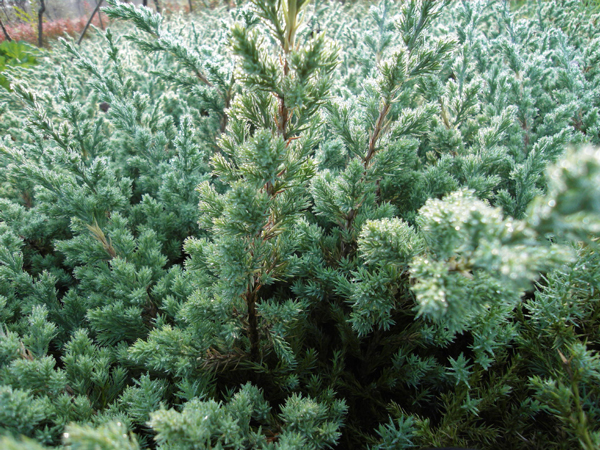
The dead zone is the area inside the canopy of the shrub where there is no green growth. It's totally healthy and perfectly natural for junipers to develop dead zones. When light isn't able to penetrate to the inside of the shrub, the juniper responds by focusing its energy on growing outward and shedding its inner foliage. Even if the dead zone is exposed to light by severe pruning, the juniper won't be able to generate new growth, and the result will be a large, dead spot.
If a juniper has outgrown its space and cutting back will expose the dead zone, remove the lower limbs to raise the canopy. This will transform a large, overgrown juniper shrub into an attractive small tree. Cut the branches all the way back to expose the peeling bark and interesting (and sometimes slightly contorted) trunk.
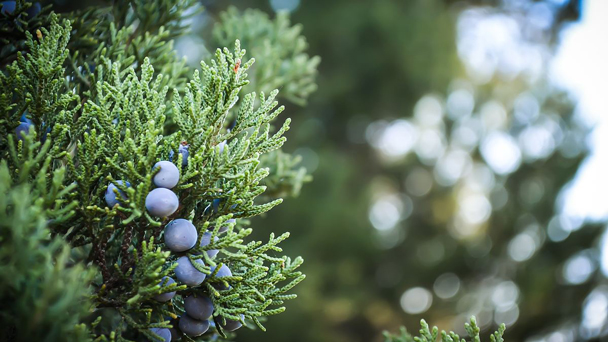
Juniper horizontalis ‘Wiltonii’ – striking silvery blue needles that turn purple in winter cold; this variety is female and will produce light blue berries; performs well in southern heat; grows up to 6” x 8’
Juniper x pfitzeriana ‘Compacta’ – a low growing, spreading shrub that usually grows up to 18” x 6’; attractive gray-green foliage
Juniper procumbens ‘Greenmound’ – produces a soft green undulating mat of growth; grows to 8” x 6’
Juniper procumbens ‘Nana’ – this dwarf form tends to mound upon itself, resulting in a mounding habit; an excellent spreader that can grow to 2’ x 12’ with time
Juniper squamata ‘Blue Star’ – dramatic blue foliage stands out in the landscape; this variety grows low and slow, eventually reaching 3’ x 4’; languishes in humid environments
Narrow Selections
Juniper chinensis ‘Spartan’ – excellent narrow, columnar or slightly cone shaped habit; usually grows to 20’ x 4’, but can be a bit shorter and wider given environmental conditions
Juniper virginiana ‘Brodie’ – a tightly columnar form that grows up to 25’ x 6’; new summer growth is soft green, fading to sage in the winter; a female variety that will produce attractive berries rather than allergy-inducing pollen; poor root system makes this variety more susceptible to wind damage
Juniper virginiana ‘Taylor’ – this narrow form is an excellent alternative to Italian cypress; silvery blue-green foliage that may bronze in the winter; grows up to 20’ x 4’
How to Grow Juniper (Juniperus communis)
The most reliable ways to obtain junipers for your garden are by taking a cutting, air layering, or by purchasing a seedling. It's technically possible to grow juniper from seed, but it's not recommended. Planting by seed requires up to four years before you’ll have a shrub you can transplant, and the process isn't easy. Germination is unreliable, and the seeds require a lengthy stratification period.Steps for Juniper (Juniperus communis) Propagation with Stem Cuttings
Cuttings are the most reliable, not to mention fast, way of reproducing your shrubs.In early to mid-spring, take a six- to eight-inch cutting from a hardwood branch that is at least a fourth of an inch in diameter.
After collecting your cuttings, snip the bottom of each at a 45-degree angle and remove the leaves from the bottom half.
Dip the cut end in a rooting hormone compound like Bontone II, made by Bonide.
If you're looking to pick some up for your gardening kit, head to Arbico Organics.
Combine one part sand with three parts seed starting soil. Then, combine that with an equal amount of perlite or vermiculite and mix well. Fill a four-inch pot with this mixture.
Make a hole in the soil using a pencil or chopstick and insert the cutting so that at least two inches are buried.
Place in a spot with bright, indirect sunlight and keep the soil moist (but not wet).
After three months or so, roots should begin to form. Give the cutting a gentle tug to see if it resists. If it does, the roots are growing in the soil.
At that point, harden rooted cuttings off for four weeks. That means bringing the plant outdoors in a shaded, protected area for 30 minutes on the first day, then add about 30 minutes of outdoor exposure each day to follow until the plant can sit outside all day.
Bring cuttings in each night, and don’t put them outside on days when there are harsh winds or extreme temperatures. You want to acclimate them to the outdoors gradually. In three or four weeks, you can leave the cuttings outdoors full time.
When the winter rolls around, store the potted cuttings outdoors under protection like insulating foam or a thick layer of pine boughs. Remove the cover in the early spring.
Plants should be about a foot tall before you plant them in their permanent home, which should be in the late spring if everything goes according to plan.
Steps for Juniper (Juniperus communis) Propagation with Layers
Air layering is a technique that involves exposing the interior of the wood on a branch or stem so that the plant sends out roots. You can then remove the newly rooted section from the parent plant.This is a common technique used by gardeners who are training junipers as bonsai, but it works well for propagating plants from mature outdoor shrubs as well.
In the spring, when air temperatures are above 45°F, locate a branch or stem that is at least a quarter inch in diameter, a foot long, and woody. Clip away any foliage from the middle four inches.
Using a clean, sharp knife, cut two parallel vertical rings around the branch about an inch apart. Then, use the knife to strip away the bark between the two cuts.
The goal is to just expose the lighter interior wood, which means you’ll need to cut through the bark and green cambium layer.
Then, wrap moistened sphagnum moss around the cut. The moss should extend about an inch above and below the cut.
Cover the sphagnum moss in clear plastic and secure it at the top and bottom with zip ties, twist ties, or string.
Keep an eye on the moss and occasionally check to make sure that it is still moist. If it dries out, pour in a little water or spray the moss with a spray bottle and reseal.
Within a few months, you should see lots of roots growing in the moss. At that point, you can cut the branch or stem just below the plastic bag. Remove the plastic and moss, and plant as you would a transplant.
How to Care for Juniper (Juniperus communis)
Light
As you know, junipers are sun-loving plants, so it is better to plant them in full sun. Most species grow in the mountains on the rocks, so no one prevents them from getting a lot of suns. These are the conditions you need to provide for them.Soil
Juniper grows on rocks in rocky soil. Therefore, it is better to plant these plants in well-drained soil with the addition of organic matter. Soil acidity is not particularly important. Also, these plants feel great on poor soils. The ideal substrate is a mixture of garden soil with compost and a small number of small stones. The amount of organic matter should not exceed 25%. You can also arrange drainage at the planting site.Water
When established, junipers are exceptionally drought tolerant plants rarely if ever requiring supplemental irrigation. If during prolonged drought you see foliage color fading or foliage wilting this could be an indicator that your plants need a good deep soaking.Temperature and Humidity
Common junipers are native to the cool temperate climates of the Northern Hemisphere, and as such are tolerant of a wide range of temperatures. At their maximum, common junipers can withstand winter temperatures as low as -45 degrees Celsius (or -49 degrees Fahrenheit), and may frequently experience summer temperatures as high as 30 degrees Celsius (or 80 degrees Fahrenheit). Common junipers grow well in USDA zones 2 through 7.Fertilizer
Junipers are typically light feeders however will benefit from an annual feeding. Fertilize juniper plants in late winter or early spring before new growth begins to flush with a slow-release shrub & tree food. Alternatively, you can feed with a natural or organic plant food, preferably one that contains iron for deep greening.Pruning
Junipers tolerate pruning extremely well and are excellent candidates for hedging, topiary and even bonsai. However, these tough trees won't forgive heavy-handed pruning. Before trimming a juniper, it's important to begin by identifying the “dead zone” and avoid cutting into it.The dead zone is the area inside the canopy of the shrub where there is no green growth. It's totally healthy and perfectly natural for junipers to develop dead zones. When light isn't able to penetrate to the inside of the shrub, the juniper responds by focusing its energy on growing outward and shedding its inner foliage. Even if the dead zone is exposed to light by severe pruning, the juniper won't be able to generate new growth, and the result will be a large, dead spot.
If a juniper has outgrown its space and cutting back will expose the dead zone, remove the lower limbs to raise the canopy. This will transform a large, overgrown juniper shrub into an attractive small tree. Cut the branches all the way back to expose the peeling bark and interesting (and sometimes slightly contorted) trunk.
Pests and Diseases
Common junipers are susceptible to a number of common pests and diseases. Watch out for diseases such as juniper blight, twig blight, and cedar apple rust - all of which can be handled with prompt and aggressive pruning. Common pests of the common juniper include bagworms, juniper scale, aphids, and more. Checking the shrub over semi-annually for signs of pests and using an insecticide when needed should keep any major infestations under control.Varieties of Juniper (Juniperus communis)
There are a multitude of Juniperus varieties available from local garden centers and specialty nurseries. A few popular ones are described below.Juniper horizontalis ‘Wiltonii’ – striking silvery blue needles that turn purple in winter cold; this variety is female and will produce light blue berries; performs well in southern heat; grows up to 6” x 8’
Juniper x pfitzeriana ‘Compacta’ – a low growing, spreading shrub that usually grows up to 18” x 6’; attractive gray-green foliage
Juniper procumbens ‘Greenmound’ – produces a soft green undulating mat of growth; grows to 8” x 6’
Juniper procumbens ‘Nana’ – this dwarf form tends to mound upon itself, resulting in a mounding habit; an excellent spreader that can grow to 2’ x 12’ with time
Juniper squamata ‘Blue Star’ – dramatic blue foliage stands out in the landscape; this variety grows low and slow, eventually reaching 3’ x 4’; languishes in humid environments
Narrow Selections
Juniper chinensis ‘Spartan’ – excellent narrow, columnar or slightly cone shaped habit; usually grows to 20’ x 4’, but can be a bit shorter and wider given environmental conditions
Juniper virginiana ‘Brodie’ – a tightly columnar form that grows up to 25’ x 6’; new summer growth is soft green, fading to sage in the winter; a female variety that will produce attractive berries rather than allergy-inducing pollen; poor root system makes this variety more susceptible to wind damage
Juniper virginiana ‘Taylor’ – this narrow form is an excellent alternative to Italian cypress; silvery blue-green foliage that may bronze in the winter; grows up to 20’ x 4’
Latest Updated
- Benefits of Bugleweed - 7 Science-backed Health Benefits
- Bugleweed Dangers & Side Effects - Is It Poisonous?
- How to Plant Evergreen Trees - What You Should Know
- When to Plant Evergreens - Grow Guide for Evergreen Trees
- 12 Wonderful Evergreen Shrubs for Your Garden
- 12 Popular Evergreen Plants with Pictures for Beginners
- When And How To Prune A Lilac Bush Like a Pro
- How to Grow & Care for Lilac Vine (Hardenbergia Violacea)
- Japanese Lilac Tree (Syringa Reticulata) Care & Propagation Guide
- Shumard Oak Pros and Cons - What to Know
Popular Articles
- Winter maintenance of Antirrhinum Majus
- How to Grow Terminalia Mantaly Tree
- How to Grow and Care for Crossostephium Chinense
- How to grow Antirrhinum Majus in spring
- Peristeria Elata (Dove Orchid) Profile: Info & Care Guide
- Underwatered Snake Plant (Sansevieria Trifasciata) - Signs And How To Fix
- How to Care for Brazilian Jasmine Plant (Mandevilla Sanderi)
- How to Grow & Care for Graptopetalum Purple Delight in Summer
- Rosa Chinensis (China Rose): Plant Growing & Care Tips
- How to Care for Baby Sun Rose (Aptenia Cordifolia)