American Elderberry: Grow & Care for Sambucus Canadensis
Written by Iris
Aug 11 2021
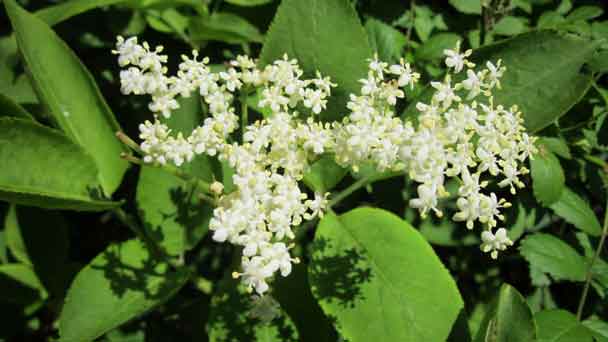
American elderberry (Sambucus Canadensis) is a multi-stem shrub that is just beginning to be grown commercially in the Midwest. The health benefits, coupled with improved varieties showing consistent yield and quality, have made elderberry of interest to growers. Elderberries grow wild throughout the Eastern and Midwestern United States and can be found along roadsides and in rivers. American Elderberry (Sambucus Canadensis) thrives in moist areas and can grow in riparian environments. Elderberry berries can be eaten directly from the bush and are sweet.
The next best time to plant your Elderberry is in early fall 6-8 weeks prior to the first frost to allow the plant to establish itself before cold temperatures set in. Be sure to keep your elderberry well watered for several weeks as it gets established.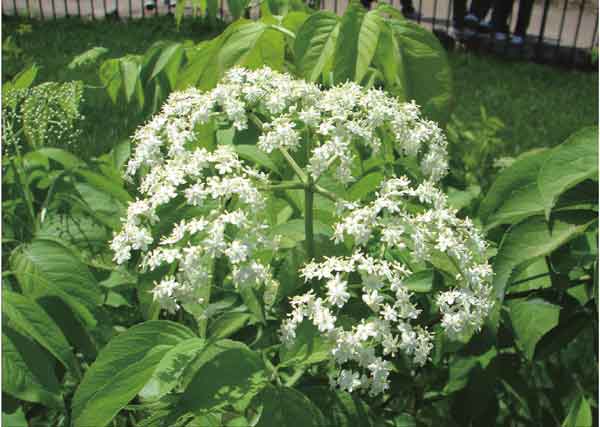
A more sure fire way to propagate is in late fall through early spring, when the plant is dormant. Select a branch from an elder bush you wish to grow and cut it into six inch pieces. Remove the leaves, keeping the nodes intact, and stick them a pot of sand mixed with peat moss or potting soil.
Soaking the cuttings in a natural willow bark rooting hormone first can help the process, but isn’t totally necessary as elderberry will readily root on its own.
Keep the pot moist and in sunlight. Roots should grow in a couple months, and then they can be planted out. If you live in a cold climate wait until spring to plant the cuttings.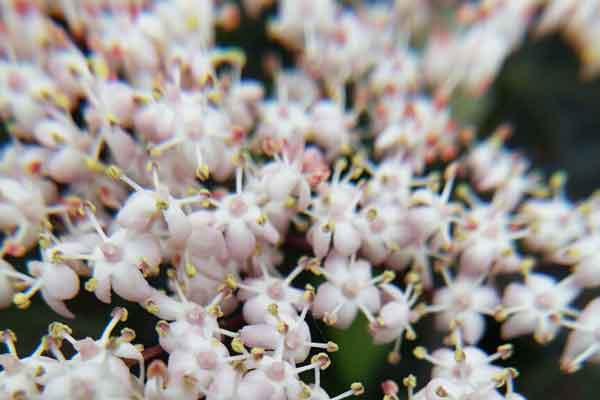
Tomato Ringspot Virus is among the most serious diseases affecting elderberries. It is spread by nematodes and through pollen transfer. Dandelions and some other weeds can also carry this virus. It results in weakened plants, reduced productivity and eventually plant death. To control the virus, the soil should be tested for nematodes prior to planting, and fumigated if necessary. Wild elderberry plants within an area of 100 ft. (31 metres) surrounding cultivated plants should be eradicated also.
Stem and twig cankers (Cytospora, Nectria, and Sphaeropsis) are among the fungus diseases which can be controlled by pruning and burning of infected canes. Powdery mildew can affect canes and berries in late summer and early fall. It results in a grey appearance on the berries, but does not lower the quality of the juice. Leaf spotting fungi, thread blight, root rots, and Verticillium are among the less common diseases.
Pests
Birds are the major pest affecting elderberries. They eat the fruits, and can be a serious problem in small plantings. Control measures include noise cannons, distress calls and prompt harvesting of ripe fruit, but the most effective means is netting.
Elder Shoot Borer
The larva is yellowish white with a double row of black dots across each body segment and a black head. It feeds inside the stem and may cause substantial dieback and loss of canes. Infested and dead canes should be cut out in the fall to destroy overwintering eggs. The adult is a moth with rust red forewings mottled with grey and yellowish grey hind wings.
Sap Beetles
Adult beetles are 5 mm in length, black with four yellow spots on the elytra. The beetles become a problem when fruit is damaged or overmature, as they are attracted by fermenting sugars. Sap beetle larvae can also be a problem. As the blooms form larvae will tunnel into the base of the bloom and feed in the centre of the flower cluster.
Eriophyid Mites
These tiny mites, visible only under microscope, attack the leaves and cause the edges to roll and yellow bands to appear. They can be controlled by dormant sprays, but their damage is normally not serious.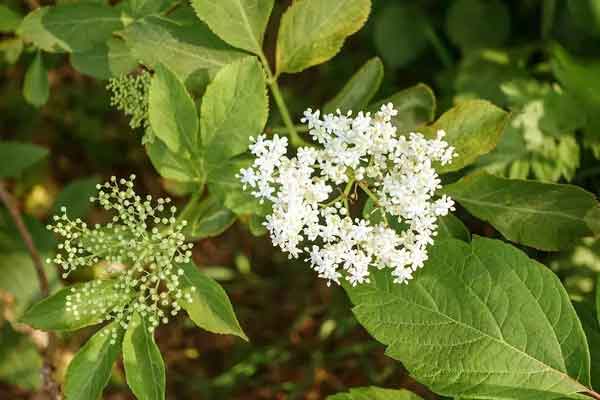
According to Nature Hills Nursery, much of the plant, particularly its leaves, stems, roots and seeds, contains chemicals that can metabolize into cyanide. Eating any of these raw can cause these chemicals to build up over time and either make you sick or kill you. If you do eat the seeds, make sure they're cooked, as heat kills the plant's cyanide-creating chemicals. One safe part of the plant is its flowers; they are often used in elderflower syrup and for flavoring in alcoholic beverages, tea or ice cream. The flowerheads are also sometimes fried and made into fritters.
How to Choose and Prepare a Planting SiteWhen to Grow American Elderberry (Sambucus Canadensis)How to Grow American Elderberry (Sambucus Canadensis)How to Care for American Elderberry (Sambucus Canadensis)American Elderberry (Sambucus Canadensis) FAQ
How to Choose and Prepare a Planting Site
In its natural habitat, the elderberry is commonly found on fertile, moist soils. Under cultivation, it is tolerant to a wide range of soil conditions, but grows best on well-drained loam soils. Good soil drainage should be considered in site selection. An open field located away from woods allows free air movement, reducing disease problems, frost and potential insect and bird damage.When to Grow American Elderberry (Sambucus Canadensis)
The best time of year to plant your Elderberry is in early spring after all threat of frost has passed. It is best to plant in the early morning or evening to avoid the peak heat of the day, allowing your plant to settle into its new location with limited stress.The next best time to plant your Elderberry is in early fall 6-8 weeks prior to the first frost to allow the plant to establish itself before cold temperatures set in. Be sure to keep your elderberry well watered for several weeks as it gets established.
How to Grow American Elderberry (Sambucus Canadensis)
Steps for American Elderberry (Sambucus Canadensis) Propagation with Seeds
The stratification required to start propagating elderberry from seed should mimic nature’s cycle. First expose seeds to warm conditions– like the normal conditions found indoors– for several months. This is followed by winter temperatures for another three months. Experts suggest you mix the seeds into a well-draining substrate like a mixture of compost and sharp sand. This should be moist but not wet and there should be enough to keep the seeds apart from one another. Put the mixture and seeds into a large zip-lock bag and let it sit somewhere with temperatures of around 68 degrees F. (20 C.) for 10 to 12 weeks. After that, place it in the refrigerator at 39 degrees F. (4 C.) for 14 to 16 weeks. At this point the seeds can be sown in an outdoor seedbed, keep moist and wait for the seedlings to appear. After a year or two, move them to their final location.Steps for American Elderberry (Sambucus Canadensis) Propagation with Cuttings
Elderberry bushes are very easy to propagate from cuttings, and you can often just cut some pieces off a growing tree and push them in the ground and they will grow. Suckers from a mature plant can also be dug up and replanted elsewhere.A more sure fire way to propagate is in late fall through early spring, when the plant is dormant. Select a branch from an elder bush you wish to grow and cut it into six inch pieces. Remove the leaves, keeping the nodes intact, and stick them a pot of sand mixed with peat moss or potting soil.
Soaking the cuttings in a natural willow bark rooting hormone first can help the process, but isn’t totally necessary as elderberry will readily root on its own.
Keep the pot moist and in sunlight. Roots should grow in a couple months, and then they can be planted out. If you live in a cold climate wait until spring to plant the cuttings.
How to Care for American Elderberry (Sambucus Canadensis)
Light
American elderberry can be grown in a variety of different sun locations, making it an ideal pick for nearly any spot in your yard or landscape. Though it can handle it all, it prefers a spot that boasts full sun or partial shade.Soil
Elderberries are a perennial crop that require proper soil preparation before planting. A soil test will help determine existing nutrient levels and ultimately the suitability of the site. On sandy soils or soils low in fertility, organic matter such as manure or peat should be incorporated prior to planting to increase moisture retention and provide nutrients. The site should be cultivated and properly drained prior to planting. Eradication of perennial weeds prior to planting by cultivation and/or herbicides will help improve plant establishment. On heavy or poorly drained soils, plant vigour may be improved by planting on raised beds.Water
Elderberries need a lot of water, but as long as the roots have had a chance to anchor themselves, the shrub can handle periods of drought. The soil around an elderberry shrub should be moist, but not waterlogged.Temperature and Humidity
American elderberry shrubs' easygoing nature extends to temperature and humidity as well. While elderberries thrive in zones 3–11, they're deciduous through zone 8, and evergreen in zones 9–11, where there is no frost.Fertilizer
Growing elderberries doesn't require a lot of maintenance. Once plants are a year old, fertilize yearly in early spring, right before the plant comes out of dormancy. Add composted chicken manure (never apply fresh manure, it will burn the roots, especially with shallow-rooted plants like elderberries) and top it off with fresh mulch. You can use fresh rabbit manure, but remember all poultry and cattle manure should be composted down. Take the manure and mulch out to the drip line of the plant (from the base of the plant to the end of the branches). Each spring you'll extend this area to keep up with the growth of the plant.Pruning
The largest berries grow on new shoots, wlth smaller berries forming on the previous year's growth. Cultural practices In Missouri are to cut the bush down after harvest and grow new shoots every year. This has several benefits. First, it produces larger but fewer overall clusters of berries, making harvest easier and quicker. Second, it helps to narrow the ripening window. Instead of taking 4-5 weeks to ripen and harvest, the process can be completed in 3-4 weeks. This is significant because harvesting requires multiple passes through the orchard. Finally, pruning to the ground every year results in a more uniform height of stems, which could facilitate future mechanized harvesting. Cultural practices in northern climates are being studied to determine if cutting the entire plant down is feasible, or if an alternative pruning regime will be needed. Alternate pruning regimes include complete removal every other year, selective pruning of the largest stems, or not pruning at all.Pests and Diseases
DiseasesTomato Ringspot Virus is among the most serious diseases affecting elderberries. It is spread by nematodes and through pollen transfer. Dandelions and some other weeds can also carry this virus. It results in weakened plants, reduced productivity and eventually plant death. To control the virus, the soil should be tested for nematodes prior to planting, and fumigated if necessary. Wild elderberry plants within an area of 100 ft. (31 metres) surrounding cultivated plants should be eradicated also.
Stem and twig cankers (Cytospora, Nectria, and Sphaeropsis) are among the fungus diseases which can be controlled by pruning and burning of infected canes. Powdery mildew can affect canes and berries in late summer and early fall. It results in a grey appearance on the berries, but does not lower the quality of the juice. Leaf spotting fungi, thread blight, root rots, and Verticillium are among the less common diseases.
Pests
Birds are the major pest affecting elderberries. They eat the fruits, and can be a serious problem in small plantings. Control measures include noise cannons, distress calls and prompt harvesting of ripe fruit, but the most effective means is netting.
Elder Shoot Borer
The larva is yellowish white with a double row of black dots across each body segment and a black head. It feeds inside the stem and may cause substantial dieback and loss of canes. Infested and dead canes should be cut out in the fall to destroy overwintering eggs. The adult is a moth with rust red forewings mottled with grey and yellowish grey hind wings.
Sap Beetles
Adult beetles are 5 mm in length, black with four yellow spots on the elytra. The beetles become a problem when fruit is damaged or overmature, as they are attracted by fermenting sugars. Sap beetle larvae can also be a problem. As the blooms form larvae will tunnel into the base of the bloom and feed in the centre of the flower cluster.
Eriophyid Mites
These tiny mites, visible only under microscope, attack the leaves and cause the edges to roll and yellow bands to appear. They can be controlled by dormant sprays, but their damage is normally not serious.
American Elderberry (Sambucus Canadensis) FAQ
Is American Elderberry (Sambucus Canadensis) Toxic?
Elderberries are edible, but the berries themselves are not eaten raw since they are bitter or poisonous depending on the species. They are mostly used in wines, jams, pies and elderberry syrup. They are also used for medicinal purposes due to their immunity-enhancing properties, and they can reduce the severity and length of colds.According to Nature Hills Nursery, much of the plant, particularly its leaves, stems, roots and seeds, contains chemicals that can metabolize into cyanide. Eating any of these raw can cause these chemicals to build up over time and either make you sick or kill you. If you do eat the seeds, make sure they're cooked, as heat kills the plant's cyanide-creating chemicals. One safe part of the plant is its flowers; they are often used in elderflower syrup and for flavoring in alcoholic beverages, tea or ice cream. The flowerheads are also sometimes fried and made into fritters.
How Fast Does an American Elderberry Shrub Grow?
American elderberries have a moderate growth rate, growing 6 to 12 feet tall within three years of planting. These plants spread through suckers to become a dense hedge. They typically begin producing fruit within two to three years of planting, as well.
Latest Updated
- Benefits of Bugleweed - 7 Science-backed Health Benefits
- Bugleweed Dangers & Side Effects - Is It Poisonous?
- How to Plant Evergreen Trees - What You Should Know
- When to Plant Evergreens - Grow Guide for Evergreen Trees
- 12 Wonderful Evergreen Shrubs for Your Garden
- 12 Popular Evergreen Plants with Pictures for Beginners
- When And How To Prune A Lilac Bush Like a Pro
- How to Grow & Care for Lilac Vine (Hardenbergia Violacea)
- Japanese Lilac Tree (Syringa Reticulata) Care & Propagation Guide
- Shumard Oak Pros and Cons - What to Know
Popular Articles
- Winter maintenance of Antirrhinum Majus
- How to Grow Terminalia Mantaly Tree
- How to Grow and Care for Crossostephium Chinense
- How to grow Antirrhinum Majus in spring
- Peristeria Elata (Dove Orchid) Profile: Info & Care Guide
- Underwatered Snake Plant (Sansevieria Trifasciata) - Signs And How To Fix
- How to Care for Brazilian Jasmine Plant (Mandevilla Sanderi)
- How to Grow & Care for Graptopetalum Purple Delight in Summer
- Rosa Chinensis (China Rose): Plant Growing & Care Tips
- How to Care for Baby Sun Rose (Aptenia Cordifolia)