How to Build a Gazebo Roof with the Simple Ways
Written by Ivy
Dec 28 2022
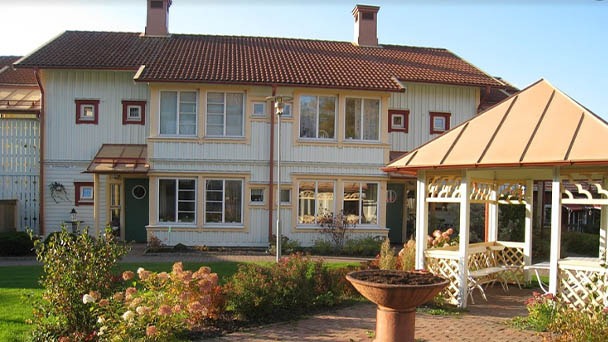
Want to build your own gazebo and save money? A prefabricated gazebo kit can easily cost $3,000 or more when used to build a traditional gazebo at home. Follow this tutorial to create a one-of-a-kind wooden gazebo that will impress your family and neighbors for less than a third of the cost if you want to save money and get a designer look.
- Step 1 – Decide the height and direction of the top ridge
- Step 2 – Install the rafters
- Step 3 – Cover the roof with plywood
- Step 4 – Place asphalt shingles on the roof
How to Build a Gazebo Roof the Easy Way
Using asphalt shingles, which are simple to install, is the simplest way to complete the project. However, you must first construct the wooden structure to house them before traveling there.
Gazebo Roof Materials and Tools
- Lumber cut to size
- Plywood sheets
- Asphalt shingles
- Galvanized screws for the rafters and upper joists
- 1 ¼" screws for the plywood
- ¾" screws for the shingles
- Circular saw
- Pen and paper
Once you have the materials, here are the steps you need to follow:
Step 1 – Decide the Height and Direction of the Top Ridge
The top ridge is the largest component of the roof. Determine the height of the roof. The roof is steeper the higher the top ridge. It usually works best at a 45° angle.
Using a piece of lumber that has been cut into the top ridge beam, determine the length of the rafters using a pen and paper. You must also decide which way the top ridge should point. To create a sense of unity, if at all possible, the gazebo's roof ought to match the roof of your home.
The top ridge and rafters can be fastened to the ground with screws before being moved over the gazebo. You'll be happy you asked your two closest friends for assistance at this point.
Your calculations should have been accurate because the top ridge will fit perfectly. If not, take it down once more and cut everything to size before screwing it all to the gazebo. The rafters can be fastened to the upper joists' center using galvanized screws.
Step 2 – Install the Rafters
The upper joists and gazebo corners must be used as anchor points for the top ridge. Place the rafters at a distance of 24" so that the weight of the roof will be distributed evenly.
In order to complete this step, you must measure the length needed for each rafter and cut the wood to those specifications.
Step 3 – Cover the Roof With Plywood
After the rafters are screwed into place, carefully measure each section of the roof to determine how many plywood sheets to cut. For this task, use a circular saw.
After that, simply nail the plywood to the roof. Check to see if the plywood pieces fit together. Trim where necessary. When they fit like the pieces of a jigsaw puzzle, you can start fixing them with 1 ¼" screws, placed every 6".
Step 4 – Place Asphalt Shingles on the Roof
It's time to remove the bundles of asphalt sheets now. You must install two layers for the best results.
The shingles must be placed backwards for the base layer. Lay one row of shingles from the bottom edge up, starting at the top. Use a utility knife to cut the shingles sheet as required. Attach the shingles to the wooden frame using ¾" screws.
The shingles will be installed for the upper layer with the right side up, but the procedure is the same. You begin at the joists and work your way up to the top ridge. To ensure better drainage, make sure the rows overlap.
The final step is to use ridge caps, which are cut from the shingles sheet, to seal the roof's seams and prevent leaks.
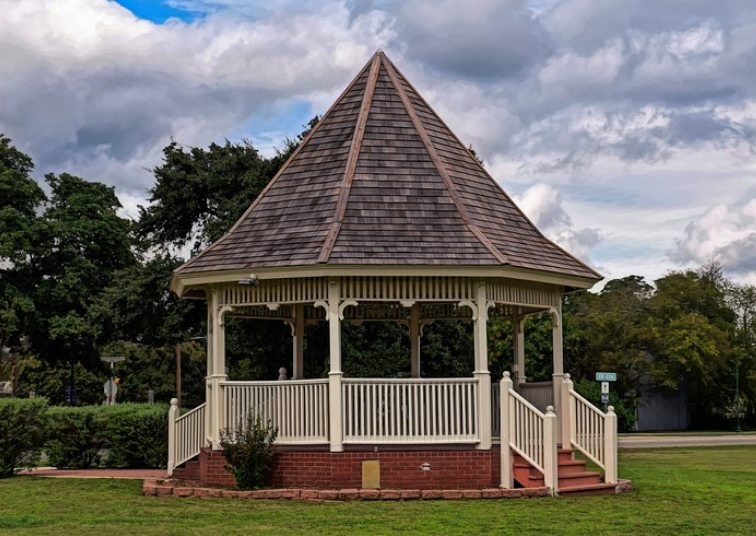
How to Build a Square Gazebo Roof
Since all of a gazebo's sides are equal and require equal construction, constructing the roof of a square gazebo is the simplest of all. The steps are the same as above, but here are a few advices you might find useful.
Hip Rafters
The hip rafters must be connected to the king post if your gazebo has one, which is the support beam that runs through the center of the structure to the peak of the roof.
Wood ties, which are made for wood on wood connections, can be used to secure the hip rafters to the king post. Use toenail screws instead if that sounds overly complicated.
Ceiling Joists
The beams that go between the hip rafters to reinforce the roof are known as ceiling joists. Wood ties can also be used to join these to the main frame. The roof structure should have an equal number of ceiling joists on each side.
Shingles
From the roof's bottom to its peak, arrange the shingles. You can use one layer of shingles if the weather is generally good and there isn't much rain where you live.
For optimal results, insulate the plywood with a sheet of tar paper. Stapling the tar paper sheet into place is the simplest method of installation. This can be completed in less than 15 minutes.
How to Put a Roof on a Gazebo That Will Last
A reinforced gazebo roof can be constructed if you're fairly handy and don't mind putting in a little extra work.
Consider adding a king post that extends from the ground to the roof's highest point in order to ensure that the gazebo roof will last longer. Unlike the corner posts, the middle post must be longer.
If you purchase standard 8-foot lumber posts for the corners, the middle one should be 10 or 12 feet. You can use a circular saw to cut it precisely to size depending on your plan.
As an alternative to the more typical and cost-effective asphalt shingles, cedar shingles are another choice. The durability and aging of wooden shingles are superior. True, installing cedar shingles over asphalt shingle sheets requires more work. But if the gazebo is something you'll use for many years to come, what's another day of labor worth?
Insulate your gazebo roof as much as you can to ensure that it will last for many years. A self-sealing membrane that prevents water from penetrating would be one solution to cover the plywood with.
Additionally, you ought to put in a nylon underlayment for ventilation between the plywood and the cedar shingles. In order for the shingles to dry out more quickly after a storm, this underlayment will allow air to flow between the plywood and them.
Construction of the gazebo's roof may not be as challenging as you initially thought. Choose the approach that works best for you and move forward incrementally.
FAQs
How Can I Make a Gazebo Roof Cheaply?
The roof of your gazebo can be removed if you don't want to spend a lot of money on it. Well, not entirely, you still need something to cover it, but you can use less material by using a sheet of heavy-duty outdoor fabric.
The gazebo can be covered for the least amount of money and most simply by draping a sizable square of water-resistant outdoor fabric over the roof and stapling it to the outer ridge. This may be effective, at least temporarily. If you live in a region with frequent, heavy rain, you should avoid using this solution because the canopy will soon begin to sag.
On the other hand, a pitched roof is still possible and can be covered with outdoor fabric. You are limited to installing the top ridge and hip rafters in order to save money and effort. A couple of inches of the fabric should hang over the rim joists after you staple it in place. This kind of roof has the benefit of allowing water to drain from the roof rather than collecting there.
How Can I Build a Gazebo Roof on My Own?
Start by taking accurate measurements. Measure, verify, and verify again. Purchase some bundles of asphalt shingle material as well as the wooden beams required for the top ridge and rafters. Make sure you have enough shingles to cover your roof in two layers by carefully calculating your numbers. This will increase the roof's durability.
A circular saw and an electric screw drill are also required for the task. Even though a hammer will function in a pinch, it's preferable to use power tools for this task.
How Do I Build a Gazebo Roof Fast?
The quickest way to cover your gazebo with a roof is to choose a flat one. This still requires some preparation, but much less so than one that involves reclining.
A support beam will need to be installed directly through the center of your square roof. The size of the gazebo determines the number of rafters you need. Two may be sufficient for a small one.
After that, cut plywood boards to fit each area of the roof and screw them in. The roof still needs to be protected against water by tar paper and at least one layer of asphalt shingles.
The disadvantage is that a flat roof will make your gazebo resemble a pergola more, but if this is not a concern, go for it. A flat roof might be harmed by significant snowfall, which is another thing to consider.
Latest Updated
- Benefits of Bugleweed - 7 Science-backed Health Benefits
- Bugleweed Dangers & Side Effects - Is It Poisonous?
- How to Plant Evergreen Trees - What You Should Know
- When to Plant Evergreens - Grow Guide for Evergreen Trees
- 12 Wonderful Evergreen Shrubs for Your Garden
- 12 Popular Evergreen Plants with Pictures for Beginners
- When And How To Prune A Lilac Bush Like a Pro
- How to Grow & Care for Lilac Vine (Hardenbergia Violacea)
- Japanese Lilac Tree (Syringa Reticulata) Care & Propagation Guide
- Shumard Oak Pros and Cons - What to Know
Popular Articles
- Winter maintenance of Antirrhinum Majus
- How to Grow Terminalia Mantaly Tree
- How to Grow and Care for Crossostephium Chinense
- How to grow Antirrhinum Majus in spring
- Peristeria Elata (Dove Orchid) Profile: Info & Care Guide
- Underwatered Snake Plant (Sansevieria Trifasciata) - Signs And How To Fix
- How to Care for Brazilian Jasmine Plant (Mandevilla Sanderi)
- How to Grow & Care for Graptopetalum Purple Delight in Summer
- Rosa Chinensis (China Rose): Plant Growing & Care Tips
- How to Care for Baby Sun Rose (Aptenia Cordifolia)