How to propagate Sedum clavatum
Written by Maggie
Nov 05 2021
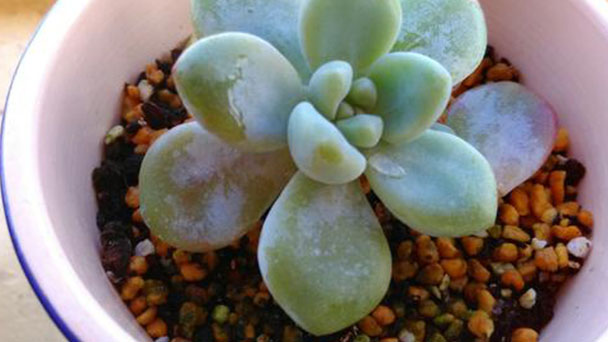
Sedum Clavatum is a presence to be reckoned with in the fleshy world, with its aromatic body and beautiful leaf shape and color, so it's been potted by many people at home. During the growing process, many people want to propagate more Sedum Clavatum after learning about the benefits of raising it. So how does the fleshly Sedum Clavatum propagate? Here are two ways to propagate Sedum Clavatum. Check it out!
Like other succulents, Sedum Clavatum can be propagated by means of leaf insertion, in which healthy leaves are inserted into the soil, but with relatively little use because leaf insertion is not as fast as cutting. In addition, sedum clavatum can also be used as a branch tillering or top branch for spiking, for drying wounds and inserting into the soil.
(1) Sedum clavatum leaf insertion propagation
In warm spring and fall, select well-grown Sedum Clavatum leaves and cut them off completely for leaf insertion propagation of Sedum clavatum. After drying the cut, lay them flat on moist sandy soil, with the leaves facing up and facing down, without having to cover the soil. After the leaves are inserted, put them in a cool place. After 10 days or so, lobules and new roots will grow at the base of the leaves, and then the roots will be buried in the soil. After it has taken root, and is maintained as Sedum clavatum is raised, it gradually grows into a strong new plant. (Find more fall plants here.)
(2) Sedum clavatum branch cutting propagation
1. Cuttings selection: In the propagation method of Sedum Clavatum, branch insertion is more practical than leaf insertion. It also grows faster and is favored by flower lovers. Choose this method, first select no pests branches in the spring and autumn, with robust growth, full leaf branches as cuttings.
2. Cuttage method: The cuttings will be appropriate pruning, length is not limited, such as the shear mouth after drying, remove the lower leaves, and then insert it into a little damp sand bed, generally 20 days after inserting, rooting can be watered, but should not be too much. After the roots are 2-3 cm long, you can change the pot and then maintain them normally.
All in all, propagating sedum clavatum is pretty easy. Whether it's leaf insertion or branch insertion, just follow the steps above. Your Sedum clavatum pot will turn into multiple pots, and when the leaves open, you can enjoy them to your heart's content! I'm going to leave you with the details of Sedum Clavatum's propagation methods, and I hope you'll find them helpful.
Latest Updated
- Benefits of Bugleweed - 7 Science-backed Health Benefits
- Bugleweed Dangers & Side Effects - Is It Poisonous?
- How to Plant Evergreen Trees - What You Should Know
- When to Plant Evergreens - Grow Guide for Evergreen Trees
- 12 Wonderful Evergreen Shrubs for Your Garden
- 12 Popular Evergreen Plants with Pictures for Beginners
- When And How To Prune A Lilac Bush Like a Pro
- How to Grow & Care for Lilac Vine (Hardenbergia Violacea)
- Japanese Lilac Tree (Syringa Reticulata) Care & Propagation Guide
- Shumard Oak Pros and Cons - What to Know
Popular Articles
- Winter maintenance of Antirrhinum Majus
- How to Grow Terminalia Mantaly Tree
- How to Grow and Care for Crossostephium Chinense
- How to grow Antirrhinum Majus in spring
- Peristeria Elata (Dove Orchid) Profile: Info & Care Guide
- Underwatered Snake Plant (Sansevieria Trifasciata) - Signs And How To Fix
- How to Care for Brazilian Jasmine Plant (Mandevilla Sanderi)
- How to Grow & Care for Graptopetalum Purple Delight in Summer
- Rosa Chinensis (China Rose): Plant Growing & Care Tips
- How to Care for Baby Sun Rose (Aptenia Cordifolia)