How to Sharpen Lawn Mower Blades With a Grinder - 2023 Guide
Written by Ivy
Jan 21 2023
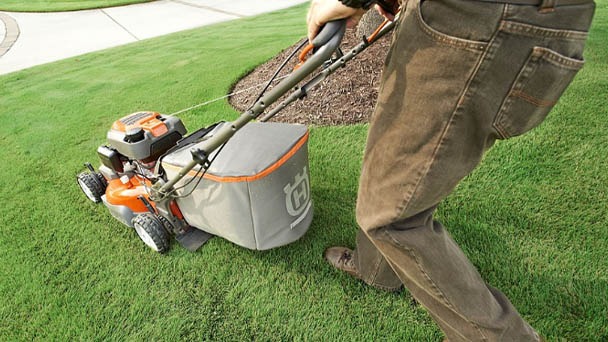
Lawnmower blades become dull and tear instead of cutting grass if they aren't periodically sharpened. A clean cut is necessary for a healthy lawn because torn blades are more susceptible to disease and sun damage.
If the lawnmower blades need to be sharpened, check the cut tips. When compared to flat files, which take time, angle grinders offer one of the simplest and fastest ways to remove nicks from the blade and reestablish a sharp edge. You only need to grind one side of a lawnmower blade because it has a chisel-type blade with one flat edge and one beveled edge.
Quick Steps to Sharpen Lawn Mower Blades With a Grinder:
- Step 1: Gather the necessary tools
- Step 2: Inspect the blades
- Step 3: Remove the center nut of the blade carefully and clamp it
- Step 4: Set the blade and edges and prepare the angle grinder
- Step 5: Run the angle grinder along the edges of the blade
- Step 6: Align the angle grinder disk with blade angle
- Step 7: Sharpen and polish the beveled edges
- Step 8: Balance the blade, grease it and fix it back
Why Sharpen a Lawn Mower Blade?
The homeowner can greatly benefit from learning how to sharpen their own lawn mower blades because a sharp blade is necessary for producing a well-cut lawn. With the right tools, sharpening a lawn mower blade only takes a few minutes and is not at all difficult, but transporting the mower to be sharpened by someone else can be extremely difficult and take several days.
A dull blade will not cut well; instead of being cut off, grass and weeds will simply bend over in front of the blade. This causes weeds to have a chance to reach the seed-bearing stage rather than being cut short, which leads to a lawn with patches of uncut grass and more weed growth. The task of mowing the lawn will be easier and result in a better-looking lawn if the lawn mower blade is kept sharp.
Tools Required
- Angle grinder
- Clamps
- Metal-grinding blade
- Safety glasses
- Work gloves
- Wrench set
Materials Required
- Block of wood
- Plastic bag
You wouldn't trim the ends off of each blade of grass if it were too long, would you? But that's precisely what a worn-out lawn mower does, leaving the torn grass susceptible to disease and sun damage. You could use a file to sharpen the mower blade, but that would take forever!), a rotary tool or a bench grinder, but we'll show you how to do the job with an angle grinder. If you don't already own a grinder, they are inexpensive to purchase and can be utilized for a variety of other tasks as well.
You'll need a socket or wrench that fits the blade nut to sharpen the blade on your lawnmower. For difficult nuts, you might need a breaker bar and/or a penetrating lubricant. A block of wood, two clamps, and an angle grinder with a metal grinding blade are also required.
How to Sharpen Lawn Mower Blades With a Grinder
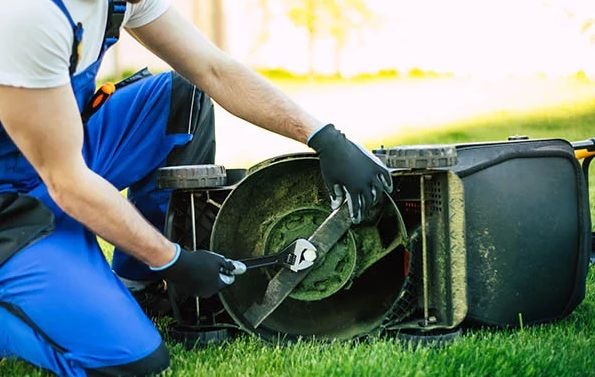
Inspection of Existing Mower Blades
The sprak plug cables need to be disconnected before beginning the sharpening process. This stops the engine from starting accidentally. Put the parking brake on as well.
Depending on the quality and usage, lawnmower blades typically need sharpening after 30 to 40 hours of use. To determine the extent of the damage to the lawnmower blades and whether sharpening them is the best option or if new blades are required, it is crucial to check the blades.
You'll need to get under the lawnmower to inspect the blades. The mower can be turned on its side easily or difficultly depending on the type. A lawnmower lift can make this part significantly easier if you have a heavy sit-down mower. Close the fuel valve, if one is available, or drain the gas from the tank, as necessary, to stop any fuel leaks.
Look for any sharp edges when inspecting the blades. To see if there is any play or obstruction offered to the rotation, try rotating the blade. When inspecting, be sure to wear your safety gloves. Keep an eye out for any large cracks or rust. To help you remember which way to reinstall your blade, mark it on one side. Replace the blade if you see significant damage.
Remove the Center Nut of the Blade Carefully and Clamp the Blade
Use a socket wrench to remove the blade by loosening the nut there. Spray the nut with some cleaner spray, such as WD-40, and wait a few minutes if you notice that it is difficult to loosen. C-clamps should be used to secure a piece of wood to the underside of the lawnmower in case the blade rotates while the nut is being removed. Remove the blade from the lawnmower body once the nut has been removed.
Put the blade in a bench vise and tighten it up as much as you can to hold it firmly in place. On opposite sides of a single long piece of metal, the blade has two cutting edges. You'll need to work on each step individually.
Set the Blade and Edges and Prepare the Angle Grinder
Apply a stiff wire brush to the blade to remove all grass, dirt, and debris. If you can't get rid of all the dirt and debris with the wire brush, rub the blades with sandpaper.
With the help of a metal grinding disk, adjust the angle grinder. Use a sharpening stone to make it more precise before using it. A polish disk, buffing disk, and cutting disk are included as supplemental tools with the metal grinding disk. They arrive, though, later. Make sure the top of the blade edge is facing you and put on some heavy-duty safety gloves. Additionally, it is advised to use the tool while wearing goggles.

Run the Angle Grinder Along the Edges of the Blade
Hold the grinder now above the blade at a slight angle to the cutting edge. Activate the grinder now. The grinder must first be pushed into the interior by running along the edge. Starting at the tip, work your way toward the non-sharp center. For both sides of the blades, repeat the procedure along the entire length of the blade edge.
Ensure that the angle of your grinder is set to the cutting edge angle. Gently rub the blade against the center of the rotating grinder blade to remove only the rough, uneven metal and prevent any cracks.
Align the Angle Grinder Disk With Blade Angle
From the inside, align the angle grinder disk with the blade's inclination. Note that this step must come after the preceding one even though it is the exact opposite of it. This process sharpens the edge and shapes the cutting corner properly. Execute the procedure along the entire length by making gentle thrusts from the center of the blades to the cutting tip. The result will be a cutting edge that is sharper, finer, and more defined.
Sharpen and Finish the Beveled Edges
Running the grinder back and forth along the blade's beveled edge is one of the final steps. A smooth blade can be identified by its shiny, scratch-free surface. It is significant to remember that the grinder is employed to even out the surface smoothness. Because of its strength, it frequently dives deep on one side while remaining shallow on the other. Keeping the blade balanced requires avoiding this.
The edges must be polished as the last step. Turn by turn, affix the polishing and buffer rings after removing the metal cutting ring. To finish the blades, carry out the same procedure using a different tool. Their lifespan will be extended, and any nicks from the grinder will be covered up.
Balance the Blade, Grease It and Fix It Back
It's crucial that the blades are balanced to prevent deterioration. Hang it horizontally from a nail in the wall to check the balance. It will remain horizontal if it is balanced. It will incline to one side if the balance is off. A little more grining is required on the side that hangs downward due to its weight. When the balancing is complete, apply some lubricant gel to the fresh edges and the tightening nut. Put it back and tighten the nut using the mark you added earlier.
Start the mower engine after reinserting the spark plug cable. Check to see if any odd noises are made after letting it run for a while. It is time for a test run if everything appears to be in order.
Additional Tools
The lawnmower blade can be efficiently sharpened using a bench grinder. The process is comparable to the one described above. The procedure is turned around using a bench grinder. You move the blade across the grinder wheel as opposed to over it when you move the grinder.
Frequently Asked Questions
1. What is the Best Angle to Sharpen a Lawnmower Blade?
Use a 10-inch file or an angle grinder to sharpen the mower blade's edge while maintaining a 45- to 60-degree angle with the cutting edge. For some models, the angle may change. Prior to performing the sharpening, consult the user manual. The details of the blade's cutting angle should be included.
2. How Many Times Can You Sharpen a Lawnmower Blade?
After using a mower blade for 30 to 40 hours, it needs to be sharpened. based on the grass's age and type. Before changing the mower blades, you should roughly sharpen them two or three times. Even less may have been produced if the blades had not struck any sharp stones or other objects.
3. Can a Mower Blade Be Too Sharp?
However, they shouldn't be razor-sharp. Mower blades should be aggressively sharp. You shouldn't risk getting cut if you touch the blade with your hand. Too-sharp lawnmower blades also require more frequent sharpening and have a shorter lifespan.
Final Thought
All machines, including lawnmowers, need routine maintenance, particularly their blades. They are likely to become dull over time because they cut through tough, dry grass. Angle grinders offer one of the quickest and most effective methods for clearing out coarse chips from the blade and reestablishing a sharp edge. The main method for using a grinder to sharpen the blades is explained in the article. Smooth and clearly defined edges are necessary. By using the instructions, we hope you can complete the task quickly and easily at home without seeking professional assistance.
Latest Updated
- Benefits of Bugleweed - 7 Science-backed Health Benefits
- Bugleweed Dangers & Side Effects - Is It Poisonous?
- How to Plant Evergreen Trees - What You Should Know
- When to Plant Evergreens - Grow Guide for Evergreen Trees
- 12 Wonderful Evergreen Shrubs for Your Garden
- 12 Popular Evergreen Plants with Pictures for Beginners
- When And How To Prune A Lilac Bush Like a Pro
- How to Grow & Care for Lilac Vine (Hardenbergia Violacea)
- Japanese Lilac Tree (Syringa Reticulata) Care & Propagation Guide
- Shumard Oak Pros and Cons - What to Know
Popular Articles
- Winter maintenance of Antirrhinum Majus
- How to Grow Terminalia Mantaly Tree
- How to Grow and Care for Crossostephium Chinense
- How to grow Antirrhinum Majus in spring
- Peristeria Elata (Dove Orchid) Profile: Info & Care Guide
- Underwatered Snake Plant (Sansevieria Trifasciata) - Signs And How To Fix
- How to Care for Brazilian Jasmine Plant (Mandevilla Sanderi)
- How to Grow & Care for Graptopetalum Purple Delight in Summer
- Rosa Chinensis (China Rose): Plant Growing & Care Tips
- How to Care for Baby Sun Rose (Aptenia Cordifolia)