Microgreens Care & Propagation Guide
Written by Ivy
Oct 20 2021
Mircogreens are popular vegetables in recent years and is deeply loved by everyone. Up to now, Microgreens are no longer limited to some traditional ingredients. When dining out today, some unknown sprouted vegetable leaves are sometimes seen in the food, some as ingredients or decorations. Especially in Western restaurants, they are becoming more and more popular, including pea seedlings, red vegetable head seedlings and broccoli seedlings, collectively referred to as mircogreen, Mircogreen is a popular health food in recent ten years.
Before microgreens cultivation, the container and soil need to be pre selected and disinfected, and the seeds need to grow in the sterilized soil to avoid black rot or rotten roots. Peat soil or river sand can be directly used instead. If we want the seedlings to grow more lush, we can mix a small amount of manure or compost into it. Fertilizer cannot be added in the later cultivation process.
Indoors, you can control yourself to try the most suitable microgreens light. Some growers turn on their lights 24 / 7 to speed up growth. Others use a modified daylight schedule with 12 hours of rest and 12 hours. Personally, I use 18 hours and 6 hours of rest. Between the extra light time to accelerate growth and the time to allow plants to "rest". I found that when plants rest during the growth cycle, their color and taste seem better. You can try different photoperiods to see what works best for you.
Then we plant microgreens water. Don't think that nature is good. Natural mountain springs, rivers and streams are easy to be polluted, and there are viruses and bacteria that are easy to hide. In addition, outdoor planting should also be careful to be infected by insects and animals. If you want to buy, you should pay attention to whether microgreens has traces of decay, mildew or moth. It's best to buy intact and healthy ones.
Microgreens are generally planted by hydroponics. They only need water and light, and can be planted indoors without soil and fertilizer, so they are also suitable for planting at home. However, as a young plant, micro vegetable seedlings are relatively fragile, so we should be careful when planting. First of all, we need to make micro greens seeds have enough space to germinate and grow. Don't think that a small micro vegetable seedling can be planted densely. Due to insufficient space, it is easy to be too humid or hot due to lack of air circulation, Have the opportunity to mold or even rot the micro vegetables. Microgreens seeds are generally afraid of strong light and need a warm temperature of 25-32 degrees Celsius. Therefore, they should not be placed in direct sunlight and supercooled places. They should be placed in a mild indoor shade.
Microgreens is one of the simplest and fastest-growing crops at present. It provides us with fresh taste and enables families without yards to have fresh vegetables that can be planted and can be continuously supplied. Therefore, gardeners living in big cities, if you want to have your own vegetable garden and want to eat your own vegetables one day, you might as well consider microgreens, which is a dream easier to realize than "one square meter vegetable garden".
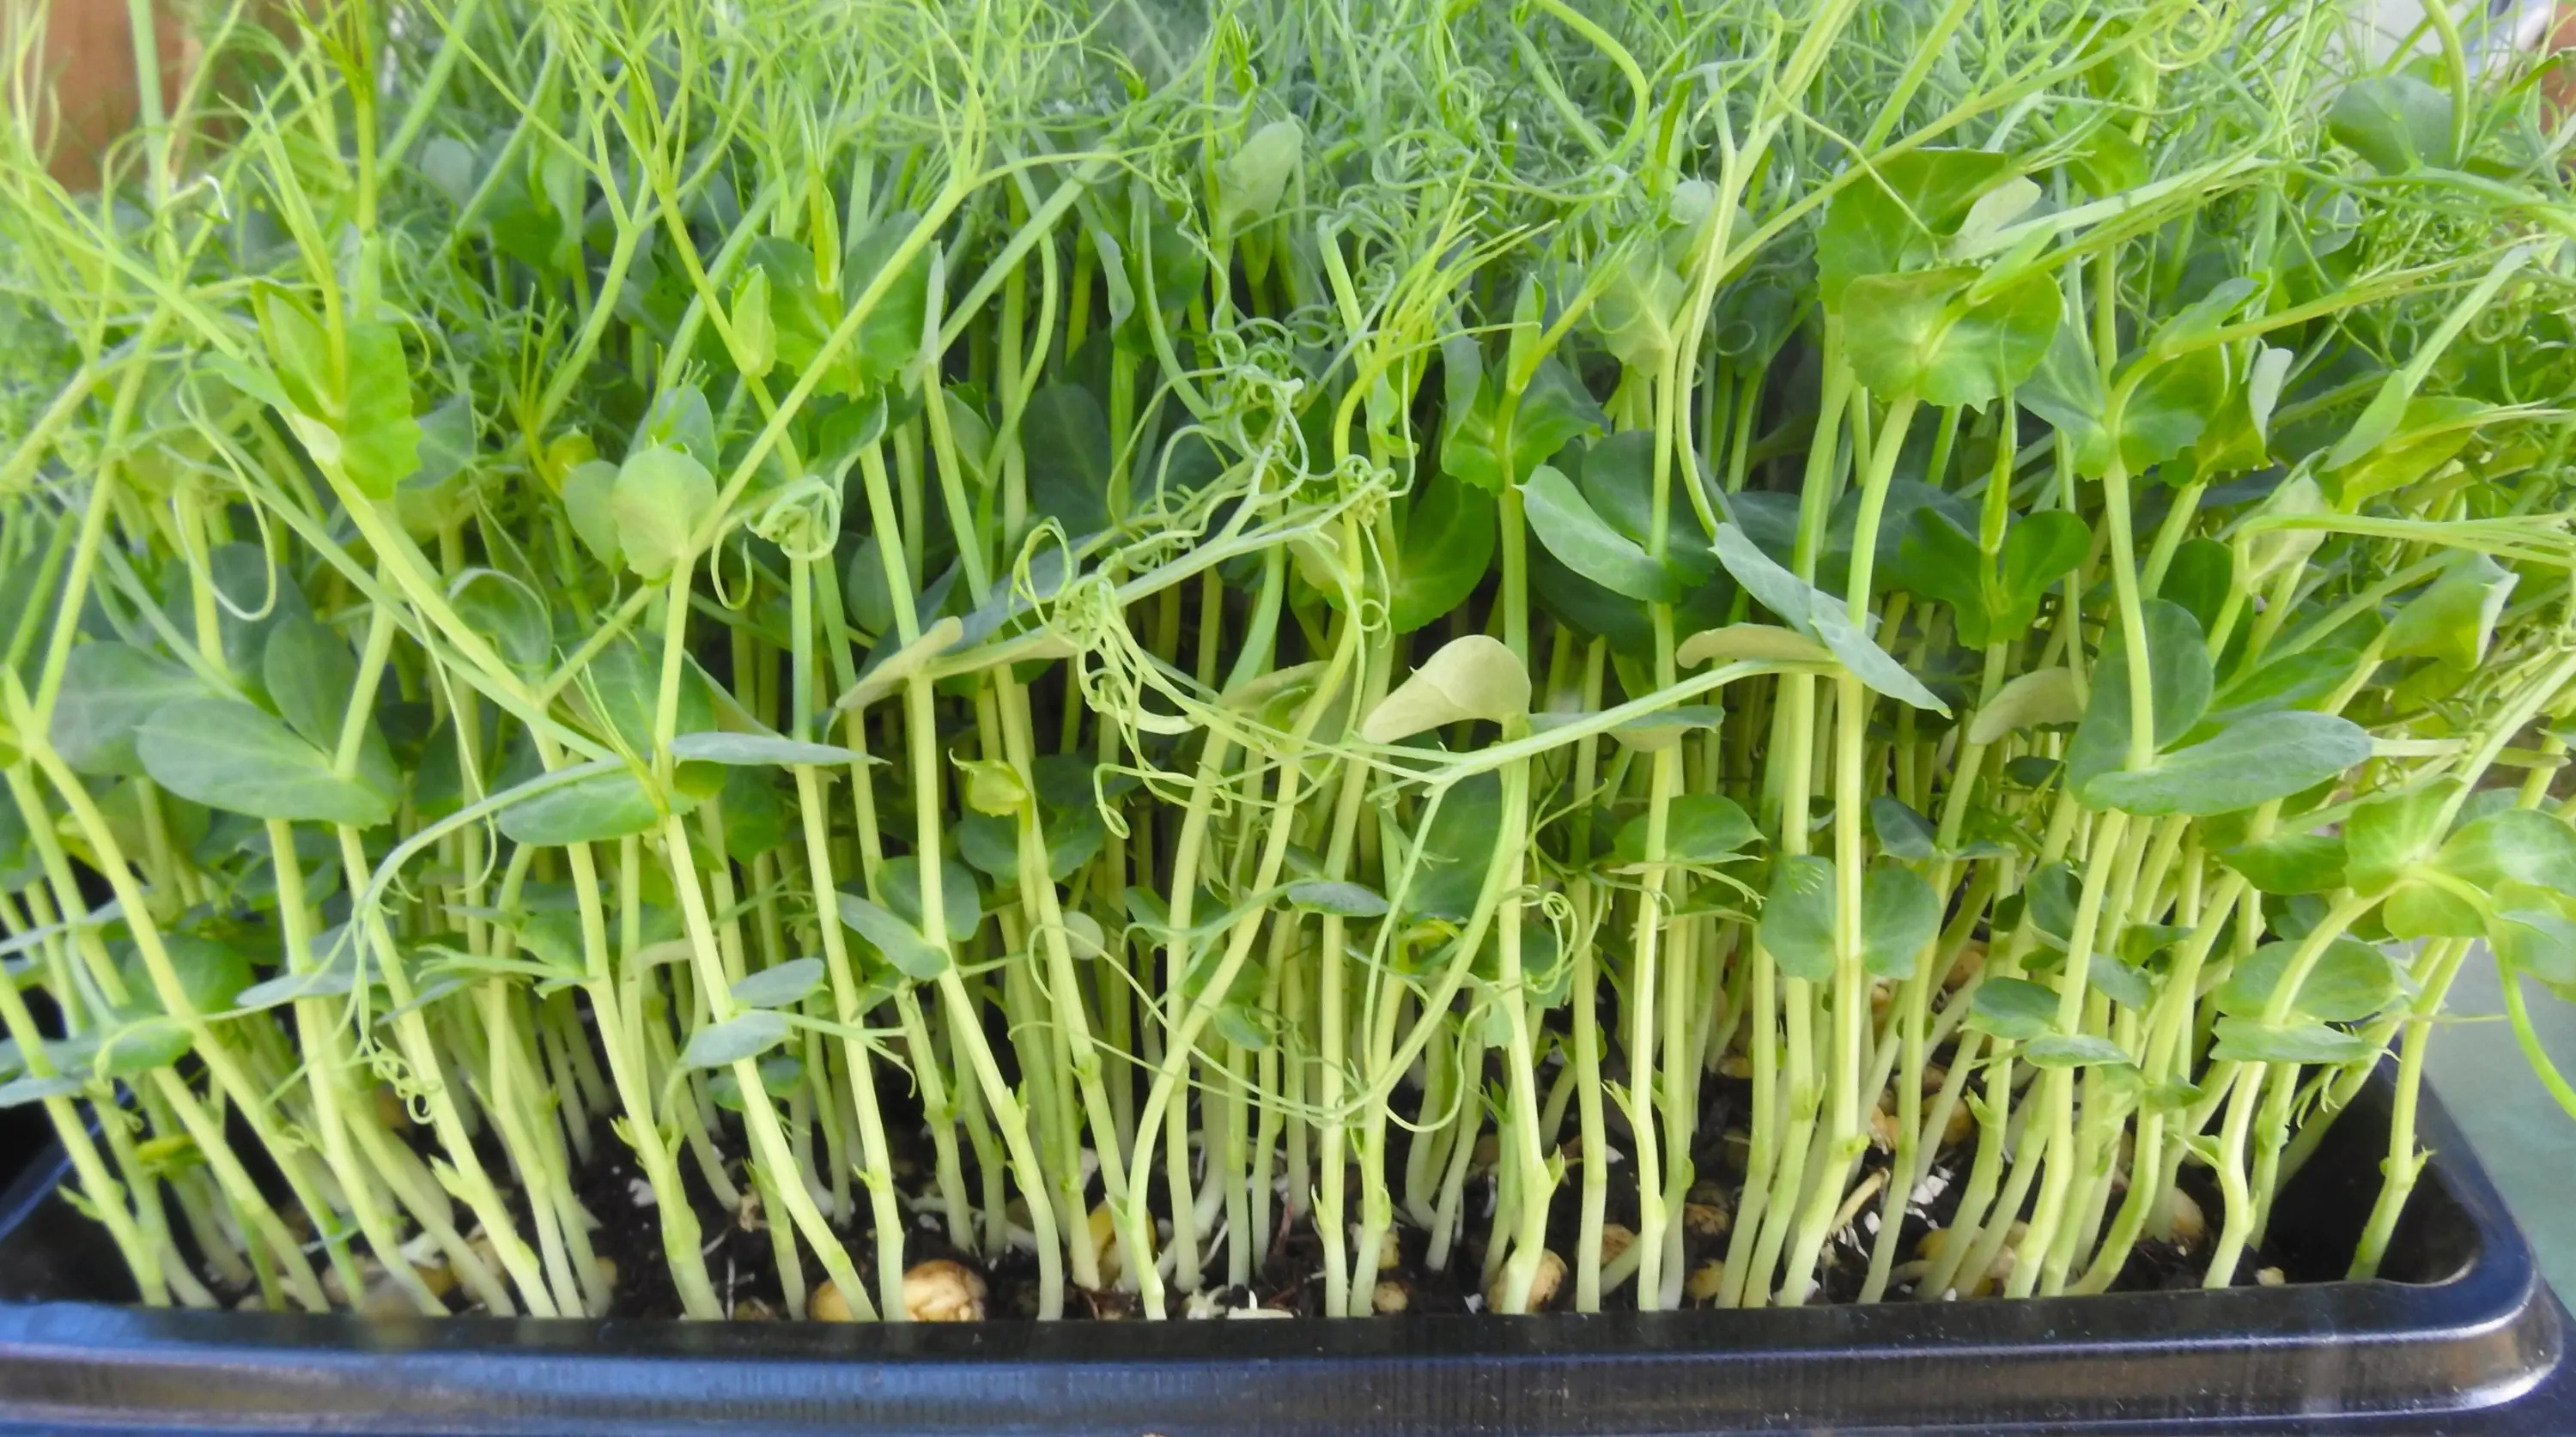
The vitamin C concentration of pea seedling microgreens is seven times that of blueberries and twice that of tomatoes; Vitamin A is four times that of tomatoes; Folic acid is twice that of tomato. Like tofu, sunflower micro seedlings contain complete protein and can provide amino acids needed by the human body.
The content of sulforaphane (sulforaphane) in microgrreens broccoli seedlings is very high, dozens of times that of mature broccoli.
In addition, microgreens tastes tender and is produced at home. It is safe without additives.
In fact, the indoor planting of microgrreens is very simple, and there are not many tools to be used. It should be noted that there can be no fungi in the soil. It must be clean. The water is best to use the filtered water. You don't use tap water directly, which will be more conducive to its growth. As for other aspects, it is mainly the conditions of light. Let's take a look at the specific methods of indoor planting microgreens.
First of all, we need to find two shallow and large plates. How shallow is it? It can hold almost an inch of soil. One of these two plates must have a drainage hole, and the other does not need a hole. The one with a hole is used to load the soil, and the one without a hole is placed below to receive the excess water flowing out. After the water flows down, it cannot stay in it for a long time, So as not to be absorbed by the soil above, resulting in too much water.
For the soil of microgrreens, it's best to choose the organic potted soil, which can be purchased directly online, because this soil is not easy to produce that kind of mold. If you can't buy it, you can use ordinary potted soil. If you use ordinary potted soil, you can bake it in the oven first, adjust the temperature to about 90 degrees, and then bake it for more than 40 minutes. Generally, seeds with large particles must be planted with soil, while those with fine particles can be cultivated with river sand or water. They must be kept at a certain temperature, which must be above 20 degrees. If we want microgrreens to germinate, we need very bright light. If the light in the room is not enough, we need to use light. We can install the lamp tube specially used for plant production.
We can buy more microgrreens seeds to make microgrreens seeds. They are usually special. We can buy them in specialty stores. They are usually sold by catty, or we can buy them directly online. These seeds have not been used with pesticides or have undergone some anti-corrosion treatment. We can't buy them indiscriminately, For seeds such as beans or corn, you can soak microgreens seeds with water before germination. Generally, you can soak them for 10 to 15 hours, or soak them directly for one night. The water temperature is about the same as room temperature. The approximate proportion is the temperature of three cups of cold water and two cups of boiling water.
We can first put the soil in a shallow plate with holes, about 3cm thick. The soil should be moistened first, and then flatten the microgreens with wood and other things, and then plant the seeds in it. The seeds can be planted more densely, but do not overlap. After planting, we should press them slightly. In order to make it germinate two or three days after planting, Therefore, it needs a darker environment. You can cover it with a black cloth or newspaper, or directly cover it with another basin. Remember to leave a seam for ventilation. After covering it for three days, open it to receive enough light, but remember to keep it dark for 12 hours during the day and at night. We should remember to sprinkle some water on it gently, 2 to 3 times a day on average.
The next step is to wait for the microgrreens to harvest. It's also very simple to harvest. Use a clean pair of scissors or just come and cut it directly from the bottom of the microgrreens. It's best to eat it quickly after cutting it, otherwise it's not fresh. So you can cut as much as you need to eat during harvest to avoid waste. Continue to spray water on the rest, Some small plants can continue to grow, and microgreens will continue to germinate, but the second finished product is not as large as the first one, and the nutrients will be slightly worse. Plants with large seeds must be harvested earlier and don't let them grow all the time, otherwise their stems may become wooden. It's best to harvest in about 7-10 days, and it's the best time to eat. Microgreens are a variety of things that are easy to pick up and quickly put away. Friends who like them can learn to plant them at home. They will have a great sense of achievement.
Microgreens Quick InfoMicrogreens Care in DetailMicrogreens WateringMicrogreens SoilMicrogreens LightMicrogreens HumidityMicrogreens FertilizerMicrogreens PruningMicrogreens Pest & Disease ControlMicrogreens Propagation in WaterMicrogreens VarietiesMicrogreens BenefitsMicrogreens Care FAQsMicrogreens nutrition chartHow to grow microgreens indoors?Microgreens recipes
Microgreens Quick Info
| Botanical/Scientific Name | Microgreens |
| Common Name | Vegetable Confetti |
| Varieties | Brassicaceae,Asteraceae,Apiaceae family |
| Uses | Salads,sandwiches,drinks,soups |
| Origin | Southern California |
| Light Care | 12 to 14 hours per day |
| Soil Care | Roughly 80% organic material |
| Temperature Care | Warm conditions: 16-25°C |
| Humidity Care | Humidity level of 40-60% |
| Watering | Water regularly |
| Pruning Care | Between damp paper towels |
| Fertilizer Care | Germinate without any fertilizer application |
| Propagation | Snip the microgreens off at soil level |
| Toxic | Safe to eat |
Microgreens Care in Detail
Microgreens Watering
We can put a little water on the tray of the Microgreens container, let the moisture permeate from the bottom and avoid breaking the young shoots. After that, we should regularly spray water to Microgreens, avoid the seedling drying, keep the soil moist and spray water. We should pay attention not to rush with the water, and Microgreens water is also added from the bottom.Microgreens Soil
At the beginning of sowing, some microgreens seeds are very small. They can be properly mixed with river sand. After careful mixing, they can be placed in containers for cultivation.Before microgreens cultivation, the container and soil need to be pre selected and disinfected, and the seeds need to grow in the sterilized soil to avoid black rot or rotten roots. Peat soil or river sand can be directly used instead. If we want the seedlings to grow more lush, we can mix a small amount of manure or compost into it. Fertilizer cannot be added in the later cultivation process.
Microgreens Light
There are many opinions on the needs of microgrreens light, just as growers have many opinions. The general rule is that plants need at least 6 hours of light every day to grow. If you use sunlight as your main light source, of course you will be limited by time. When setting up the system, paying attention to shadow mode and light direction can help you make full use of working hours.Indoors, you can control yourself to try the most suitable microgreens light. Some growers turn on their lights 24 / 7 to speed up growth. Others use a modified daylight schedule with 12 hours of rest and 12 hours. Personally, I use 18 hours and 6 hours of rest. Between the extra light time to accelerate growth and the time to allow plants to "rest". I found that when plants rest during the growth cycle, their color and taste seem better. You can try different photoperiods to see what works best for you.
Microgreens Humidity
After the microgrreens seeds germinate, we remove the film and put the flowerpot on the sunny windowsill to let your microgrreens grow. To keep the environment around the plant moist, daily watering is recommended to be carried out through bottom watering. That is, pour the water into the water tray at the bottom of the flower pot so that microgreens can be absorbed into the soil. After the seeds germinate, remove the film and put the flowerpot on the sunny windowsill to let your microgrreens grow. To keep the environment around the plant moist, daily watering is recommended to be carried out through bottom watering. That is, pour the water into the water tray at the bottom of the flower pot and let it be absorbed into the soil.Microgreens Fertilizer
It should be noted that there is no need for fertilizer to cultivate these microgreens. A little pile of fertile soil can be added to promote rapid growth. These microgreens will not have any diseases and pests, and they are very fresh and healthy.Microgreens Pruning
Generally, we can harvest microgreens in 7 days. Of course, some slow growing vegetable seeds take about 1 ~ 3 weeks. Once microgreens grow real leaves, it is time to harvest. We can directly cut off the top of the rhizome and prepare a clean and sharp scissors for pruning. The bottom will not grow again. If we cut it once, it will be gone.Microgreens Pest & Disease Control
Since microgreens are mostly eaten raw, we should pay great attention to them during planting. In addition to the above microgreens diseases such as mildew and decay caused by space, humidity or climate, we should also pay attention not to let the micro seedlings be infected during growth. The first thing to pay attention to is the source of seeds. Generally, micro vegetable seedlings sold for food have been tested for bacteria to ensure safety. Therefore, it is best to buy them in large supermarkets or reputable individual farms.Then we plant microgreens water. Don't think that nature is good. Natural mountain springs, rivers and streams are easy to be polluted, and there are viruses and bacteria that are easy to hide. In addition, outdoor planting should also be careful to be infected by insects and animals. If you want to buy, you should pay attention to whether microgreens has traces of decay, mildew or moth. It's best to buy intact and healthy ones.
Microgreens Propagation in Water
Microgreens can be planted by hydroponics and nutrient solution. Microgreens pure hydroponics is a good choice.Microgreens are generally planted by hydroponics. They only need water and light, and can be planted indoors without soil and fertilizer, so they are also suitable for planting at home. However, as a young plant, micro vegetable seedlings are relatively fragile, so we should be careful when planting. First of all, we need to make micro greens seeds have enough space to germinate and grow. Don't think that a small micro vegetable seedling can be planted densely. Due to insufficient space, it is easy to be too humid or hot due to lack of air circulation, Have the opportunity to mold or even rot the micro vegetables. Microgreens seeds are generally afraid of strong light and need a warm temperature of 25-32 degrees Celsius. Therefore, they should not be placed in direct sunlight and supercooled places. They should be placed in a mild indoor shade.
Microgreens Varieties
Before planting microgreens, we should clearly see the sowing instructions. The planting depth of each microgreens plant is different. It can be cultivated with wet river sand, or fill the container with small particle stone and properly cover a thin layer of soil to avoid seed falling after watering.Microgreens is one of the simplest and fastest-growing crops at present. It provides us with fresh taste and enables families without yards to have fresh vegetables that can be planted and can be continuously supplied. Therefore, gardeners living in big cities, if you want to have your own vegetable garden and want to eat your own vegetables one day, you might as well consider microgreens, which is a dream easier to realize than "one square meter vegetable garden".
Microgreens Benefits
Compared with mature vegetable leaves, the cotyledons of microgrreens have stronger flavor and higher nutrient concentration (vitamins A, C, K, e, and minerals magnesium, manganese, zinc, copper, etc.). Scientific research has proved that these nutrient elements of microgreens can help prevent cancer and cardiovascular disease.The vitamin C concentration of pea seedling microgreens is seven times that of blueberries and twice that of tomatoes; Vitamin A is four times that of tomatoes; Folic acid is twice that of tomato. Like tofu, sunflower micro seedlings contain complete protein and can provide amino acids needed by the human body.
The content of sulforaphane (sulforaphane) in microgrreens broccoli seedlings is very high, dozens of times that of mature broccoli.
In addition, microgreens tastes tender and is produced at home. It is safe without additives.
Microgreens Care FAQs
Microgreens nutrition chart
Although microgreen is a vegetable in its infancy, it has richer nutritional value. Some people believe that this is because organisms are the most dynamic and energy in the growth stage, but this is just a kind of assumption. According to the research on micro seedlings by the U.S. Department of agriculture and some scientific journals, it is found that the overall nutritional content of microgreen can be several times higher than that of mature vegetables. For example, radish sulfur per gram of broccoli seedlings is two or three times higher than that of mature broccoli. This substance has antioxidant effect and is quite beneficial to the body.How to grow microgreens indoors?
How to grow microgreens indoors? Now everyone likes to eat something called microgreens. It tastes very delicious, tender and sober. Many people also begin to learn to grow microgreens at home, which is becoming more and more popular, because in fact, this method is still very simple, it is clean and good for people's health. In addition, it doesn't cost much, Therefore, more and more people have embarked on the road of planting microgrreens by themselves, but many people actually do not have a special garden to plant these things. Planting them in flower pots has become a way for many people to choose. Microgrreens are also suitable for indoor sowing. The harvest time is also very short. They can be harvested in a week or two.In fact, the indoor planting of microgrreens is very simple, and there are not many tools to be used. It should be noted that there can be no fungi in the soil. It must be clean. The water is best to use the filtered water. You don't use tap water directly, which will be more conducive to its growth. As for other aspects, it is mainly the conditions of light. Let's take a look at the specific methods of indoor planting microgreens.
First of all, we need to find two shallow and large plates. How shallow is it? It can hold almost an inch of soil. One of these two plates must have a drainage hole, and the other does not need a hole. The one with a hole is used to load the soil, and the one without a hole is placed below to receive the excess water flowing out. After the water flows down, it cannot stay in it for a long time, So as not to be absorbed by the soil above, resulting in too much water.
For the soil of microgrreens, it's best to choose the organic potted soil, which can be purchased directly online, because this soil is not easy to produce that kind of mold. If you can't buy it, you can use ordinary potted soil. If you use ordinary potted soil, you can bake it in the oven first, adjust the temperature to about 90 degrees, and then bake it for more than 40 minutes. Generally, seeds with large particles must be planted with soil, while those with fine particles can be cultivated with river sand or water. They must be kept at a certain temperature, which must be above 20 degrees. If we want microgrreens to germinate, we need very bright light. If the light in the room is not enough, we need to use light. We can install the lamp tube specially used for plant production.
We can buy more microgrreens seeds to make microgrreens seeds. They are usually special. We can buy them in specialty stores. They are usually sold by catty, or we can buy them directly online. These seeds have not been used with pesticides or have undergone some anti-corrosion treatment. We can't buy them indiscriminately, For seeds such as beans or corn, you can soak microgreens seeds with water before germination. Generally, you can soak them for 10 to 15 hours, or soak them directly for one night. The water temperature is about the same as room temperature. The approximate proportion is the temperature of three cups of cold water and two cups of boiling water.
We can first put the soil in a shallow plate with holes, about 3cm thick. The soil should be moistened first, and then flatten the microgreens with wood and other things, and then plant the seeds in it. The seeds can be planted more densely, but do not overlap. After planting, we should press them slightly. In order to make it germinate two or three days after planting, Therefore, it needs a darker environment. You can cover it with a black cloth or newspaper, or directly cover it with another basin. Remember to leave a seam for ventilation. After covering it for three days, open it to receive enough light, but remember to keep it dark for 12 hours during the day and at night. We should remember to sprinkle some water on it gently, 2 to 3 times a day on average.
The next step is to wait for the microgrreens to harvest. It's also very simple to harvest. Use a clean pair of scissors or just come and cut it directly from the bottom of the microgrreens. It's best to eat it quickly after cutting it, otherwise it's not fresh. So you can cut as much as you need to eat during harvest to avoid waste. Continue to spray water on the rest, Some small plants can continue to grow, and microgreens will continue to germinate, but the second finished product is not as large as the first one, and the nutrients will be slightly worse. Plants with large seeds must be harvested earlier and don't let them grow all the time, otherwise their stems may become wooden. It's best to harvest in about 7-10 days, and it's the best time to eat. Microgreens are a variety of things that are easy to pick up and quickly put away. Friends who like them can learn to plant them at home. They will have a great sense of achievement.
Microgreens recipes
Eating microgreens raw (juice or salad) can better maintain the vitamin elements in the leaves. Fried microgreens with minced garlic and fried eggs with microgreens are good choices. Of course, microgreens can also be used to make other creative dishes.Latest Updated
- Benefits of Bugleweed - 7 Science-backed Health Benefits
- Bugleweed Dangers & Side Effects - Is It Poisonous?
- How to Plant Evergreen Trees - What You Should Know
- When to Plant Evergreens - Grow Guide for Evergreen Trees
- 12 Wonderful Evergreen Shrubs for Your Garden
- 12 Popular Evergreen Plants with Pictures for Beginners
- When And How To Prune A Lilac Bush Like a Pro
- How to Grow & Care for Lilac Vine (Hardenbergia Violacea)
- Japanese Lilac Tree (Syringa Reticulata) Care & Propagation Guide
- Shumard Oak Pros and Cons - What to Know
Popular Articles
- Winter maintenance of Antirrhinum Majus
- How to Grow Terminalia Mantaly Tree
- How to Grow and Care for Crossostephium Chinense
- How to grow Antirrhinum Majus in spring
- Peristeria Elata (Dove Orchid) Profile: Info & Care Guide
- Underwatered Snake Plant (Sansevieria Trifasciata) - Signs And How To Fix
- How to Care for Brazilian Jasmine Plant (Mandevilla Sanderi)
- How to Grow & Care for Graptopetalum Purple Delight in Summer
- Rosa Chinensis (China Rose): Plant Growing & Care Tips
- How to Care for Baby Sun Rose (Aptenia Cordifolia)